You’ve probably seen stunning #ShotoniPhone photos online and wondered why your brand-new iPhone can’t produce similar results. The truth is, most viral images are heavily edited before they’re shared. While many photographers rely on Adobe Lightroom for fine-tuned color and detail adjustments, your iPhone’s built-in Photos app can be sufficient on its own. If you want to produce professional-looking images without advanced third-party editors, these native tools can make all the difference.
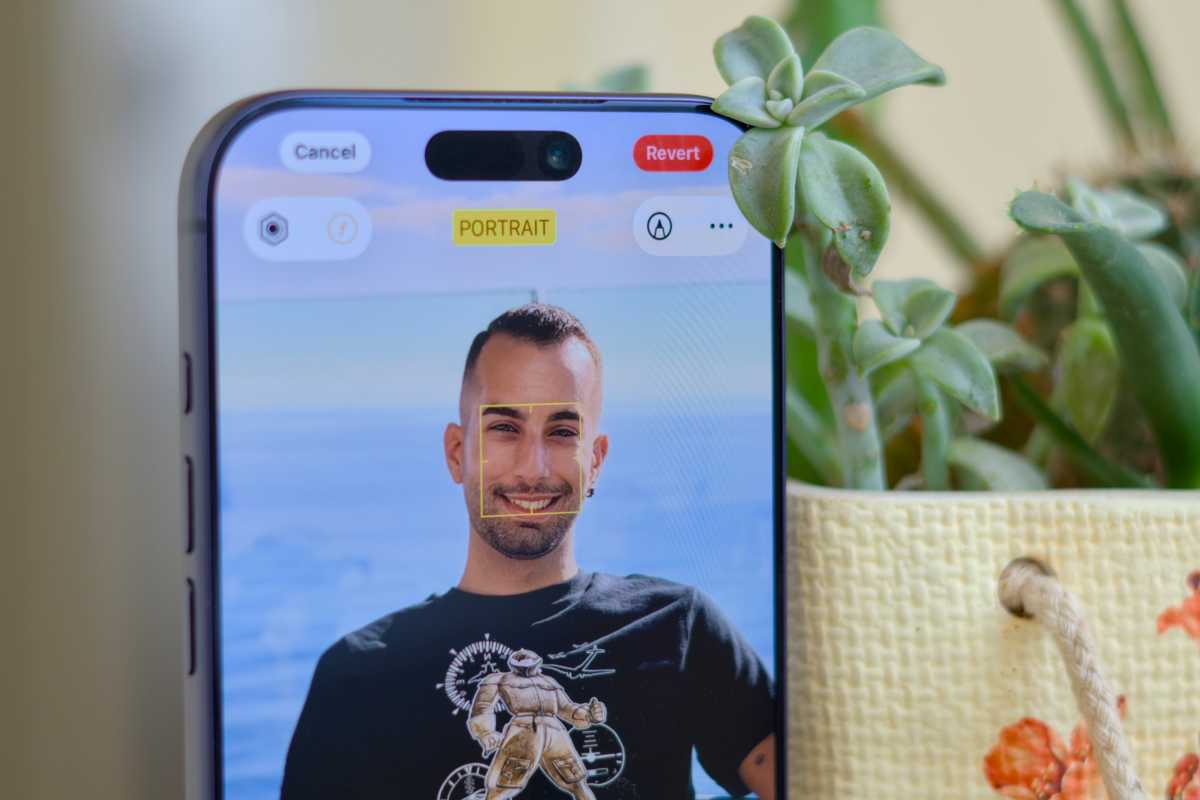
1. Automatic portraits
Mobile photography is often instantaneous and time-sensitive. You may spot your photogenic friend (or fur baby) naturally posing and decide to quickly snap a photo before they move. In these cases, it likely won’t occur to you to switch to Portrait mode in the Camera app, as you rush to capture the unplanned moment.
Fortunately, newer iPhones can automatically capture depth data in certain conditions. So, even if you take the photo using the regular shooting mode, it’ll still offer a Portrait mode look. First, ensure that the relevant option is enabled by heading to the Settings app > Camera > and double-checking the Portraits in Photo Mode toggle.
Now, whenever you take a close-up of a person, cat, or dog, you can activate the depth effect in the Portrait tab of the default photo editor. Beyond that, you can change the highlighted subject by tapping anywhere on the photo, tweak the strength of the depth effect, and add a lighting effect. These adjustments help transform your regular, spontaneous shots into polished portraits.
Foundry
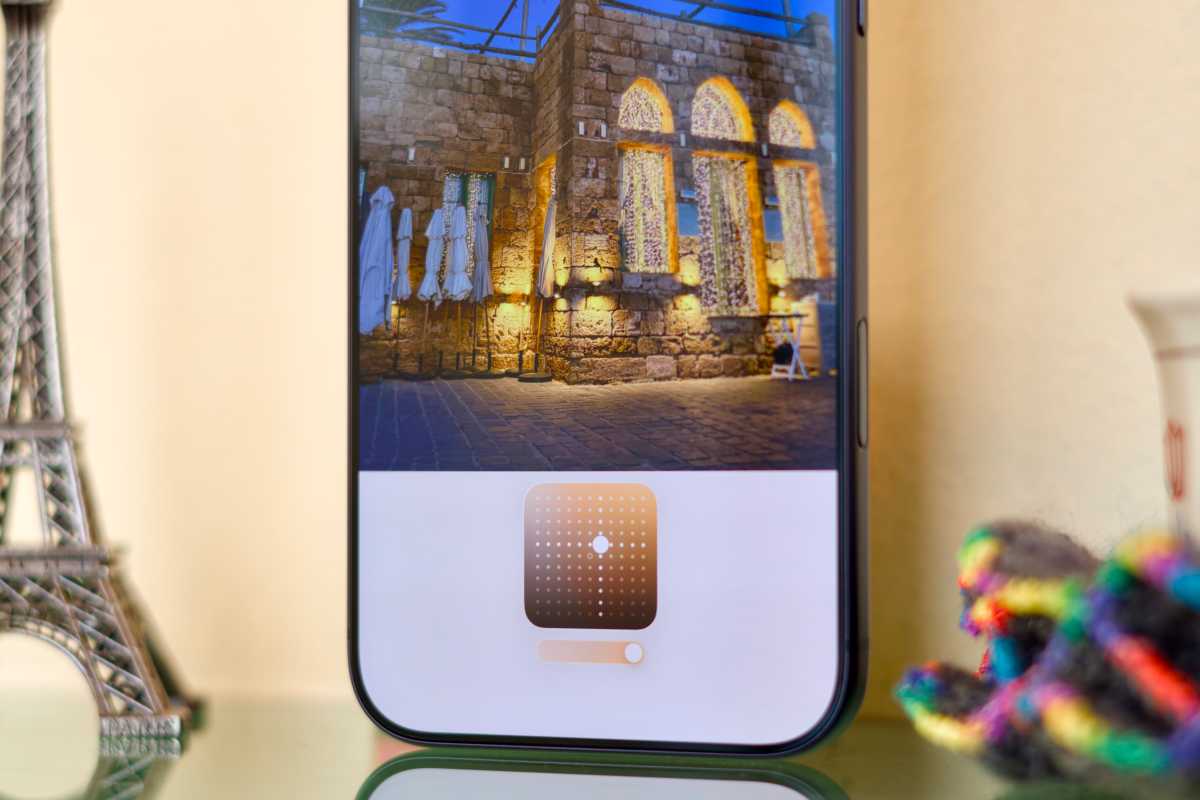
2. Photographic Styles
Photographic Styles are advanced filters that you can apply to shots taken with recent iPhone models. Unlike traditional filters, Photographic Styles let you tweak the color, tone, and palette of a certain image, giving you more control over the final look. Besides the default, standard style, you can pick between 15 unique effects, ranging from subtle to dramatic. Once you opt for one of the main styles in the photo editor, you can tap on it to customize it further and adjust its intensity using the sliders.
If you tend to stick to the same filter, you can set a default Photographic Style that applies to all of your future shots. Head to Settings > Camera > Photographic Styles, and follow the on-screen instructions.
Foundry
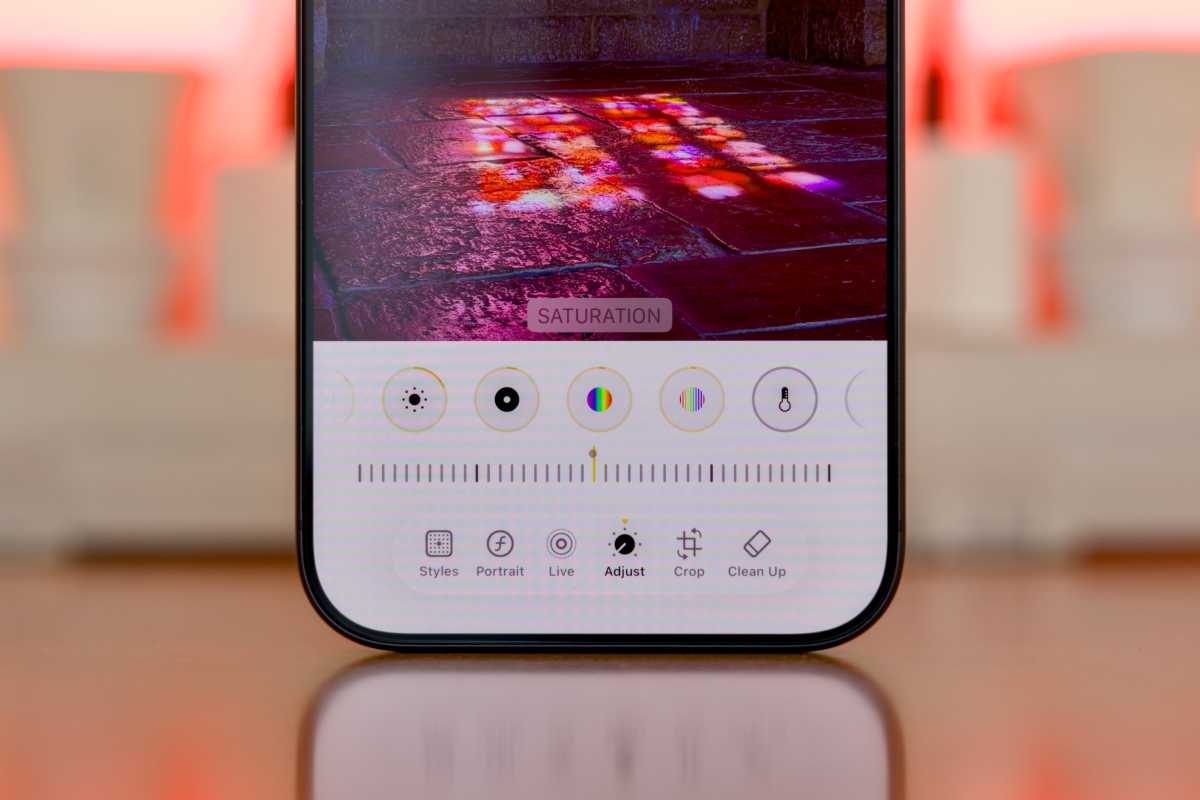
3. Image adjustments
Once you’ve chosen a Photographic Style, you can proceed to finer image adjustments that further change the overall mood. Visit the Adjust tab in the default photo editor and go through every available option. You’ve got the exposure, highlights, brilliance, contrast, saturation, warmth, noise reduction, and more. Drag each slider in both directions to see how it impacts your photo in real time and pick the suitable value for each adjustment accordingly.
For starters, I tend to lower the highlights to emphasize details, increase the shadows and drop the contrast to reveal hidden elements, and increase the saturation and vibrance to add more color to dull shots. The formula can certainly differ depending on the lighting, subject, and the image’s intended vibe.
If you’re a beginner, you may want to tap the magic wand icon, which uses on-device smarts to adjust many of the sliders automatically. You can then monitor the changes, learn what each option does, and apply additional edits manually if needed.
Foundry
4. Live Photo effects
By default, most of the shots you take with your iPhone are Live Photos. The option records 1.5 seconds of video before and after each click, letting you watch a short clip of the captured moment when you tap and hold on the photo. Its capability, however, extends beyond just tapping and holding for video playback.
When viewing a compatible image, you can tap on the Live label towards the top-left corner to reveal available Live Photo effects. My favorite effect is Long Exposure, which merges the individual frames it has captured to produce an artsy still from an otherwise meh image.
Other neat effects include Loop and Bounce, which turn your Live Photos to GIF-like files that play automatically. Notably, you need to keep your hands steady during the 3-second shooting window to get reliable results across the board.
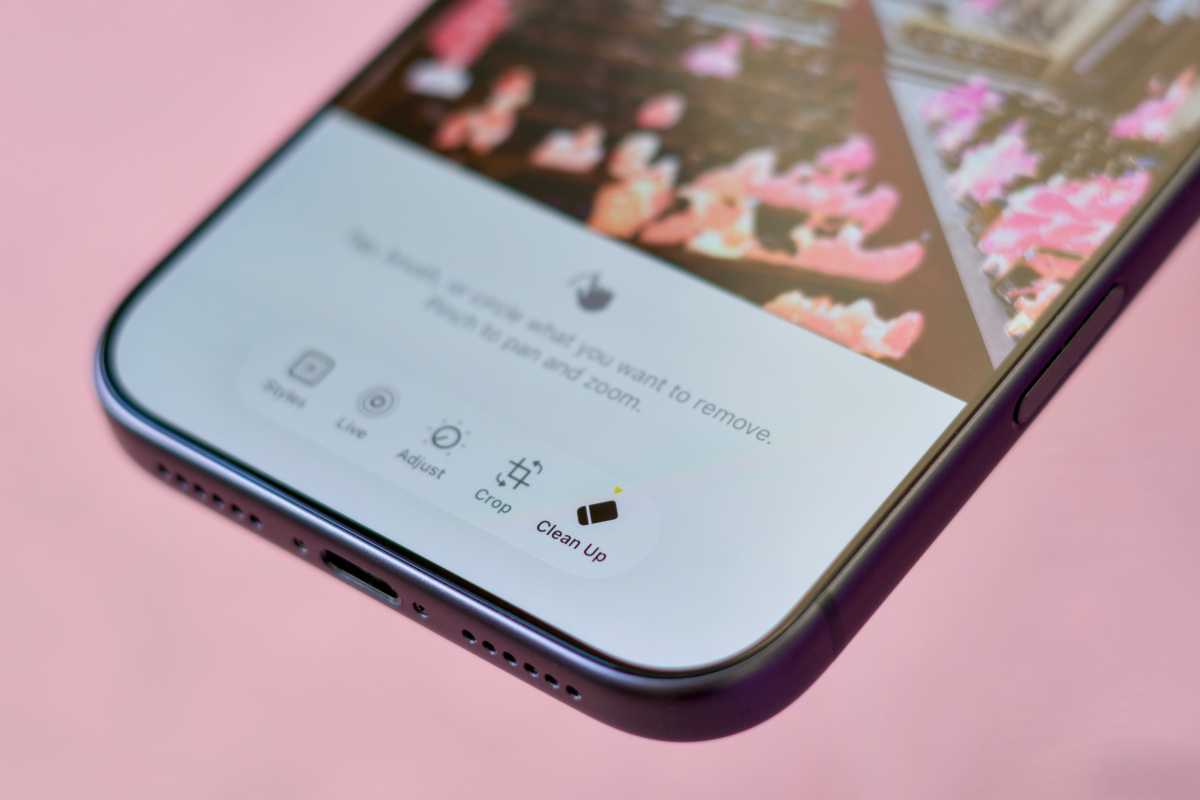
5. Clean Up
Professional photographers often rely on cloning tools to conceal blemishes and dust particles or remove unwanted people or objects in the background. The Photos app offers an AI-powered utility that serves the same purpose. Go to the Clean Up tab in the photo editor and wait for the system to process the image.
Once ready, you’ll be able to tap on detected intruders to instantly remove them from the photo. Otherwise, you could manually doodle on the object or person you’d like to remove, and Apple Intelligence will handle the rest. It’s worth noting that using Clean Up will alter the photo’s metadata, and certain social media platforms will mark it as AI—regardless of how insignificant the edit is.
Foundry
6. Geometric corrections
After you’ve perfected the above enhancements, you may want to apply one last edit before sharing the final shot. Head to the Crop tab in the photo editor and use the featured sliders to straighten the image and fix the perspective if needed. You could also crop it to exclude unnecessary elements around the edges and refine the composition.
7. Batch editing
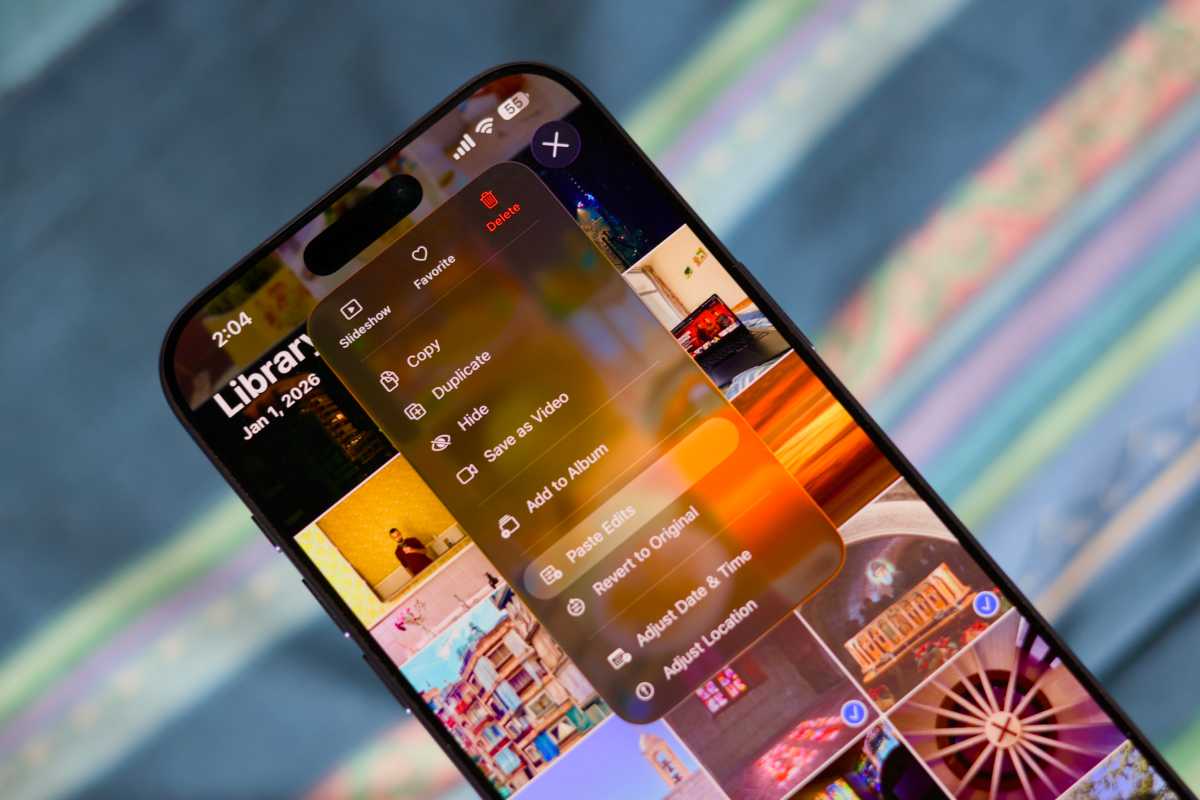
If you’ve taken multiple photos in the same setting, you wouldn’t want to manually apply all of the above-mentioned tweaks on each individual shot. Luckily, you can tap the 3-dot menu on any edited photo and hit the Copy Edits button. This will let you granularly select the kind of edits you want to copy, including image adjustments, Photographic Styles, crops, and more. You can then select a group of other photos and hit Paste Edits to batch-apply them.
Foundry